French Silk Pie

I’ve been burning through projects lately but none of them having anything to do with my 3o Before 30 list. The baby prep has really started to take over and she wasn’t even on the 3o Before 30! Thanksgiving presented the perfect opportunity for me to complete #16 – Bake a Pie From Scratch.

I decided to wait until my family’s Thanksgiving which is celebrated the Saturday after. I haven’t subjected my in-laws to my random baking experiments yet. I am sure they would be more than willing, but I know I will get very honest feedback from my parents, brothers, and sibling-in-laws.

With that said, I set out to make a gluten-free pie from scratch yesterday and settled on a French Silk Pie. I have never been a huge pie person, mainly because I am not a fan of the crust or baked fruit, so I figured as long as the filling turned out it should taste decent, right?

I did my research, and by research I mean I pinned a few recipes for gluten-free pie crust and then Googled French Silk Pie in the grocery store on a whim to make sure I had all the necessary ingredients. Then I just went for it and here is how it turned out.

I followed this recipe and this recipe for the crust. I used the Namaste All Purpose Gluten Free Flour, a stick of butter, five tablespoons of ice water and a small spoonful of sugar.

IMG_2064
Butter, Flour, and Sugar


I mixed everything by hand which made quite the mess, but I don’t think it would work very well otherwise. Especially since you are using cold butter. Most of the recipes I checked out recommended that I refrigerate the crust for at least an hour and many did it overnight. I didn’t have the overnight option (hello, procrastinator) so I refrigerated for just over an hour. Most recipes also recommended you take it out for about 10-15 minutes before rolling.


IMG_2066
Roll Out!

The rolling out was a little difficult and required a little more effort since the dough wanted to fall apart. I rolled it out more than once and then re-balled with my hands to make it feel like a more consistent product. Eventually, I made it look semi normal.


IMG_2067
Not Very Professional

I sprayed my glass pie pan with coconut oil just to ensure the crust didn’t bake directly to the pan. I wasn’t sure if I should have but did anyway. I also didn’t have a pie weight or any other fancy pie baking tools many of the recipes called for. I just rolled the crust on a counter top full of gluten-free flour.

Once it was baking at 350 degrees I watched it closely. I first set my timer for 10 minutes and then an additional 10 minutes. Once it appeared to be done (it wasn’t very golden brown but when I poked with a tooth pick it seemed done) I took it out and let it cool. Then I started the pie filling.

Following a Taste of Home recipe things came together quite well. Heating up the eggs and sugar turned out to be a longer process than expected, especially since I became nervous that it actually reached the recommended 160 degrees. Luckily I do have some  food thermometers and was able to confirm that it did reach 160, but I also don’t know if it exceeded it and was overdone. It probably was, but I get nervous about foodborne illnesses. 😉

In the end, it actually looked like French Silk Pie filling. I had Justin test it and he said the filling tasted great!

Ready to Refrigerate


I put it in the fridge until we were ready to go to my parents and then left it outside (yay for MN becoming an outdoor fridge/freezer) until we were ready to eat it. I topped with Cool Whip and shaved some frozen Dove Chocolates over the top before serving.
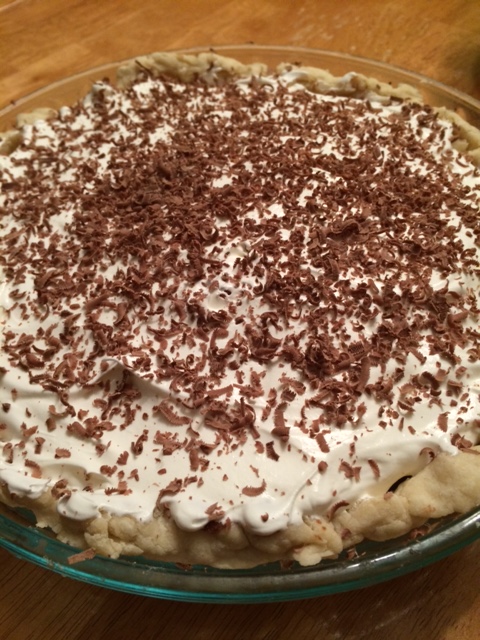
Ready to Eat
Ready to Eat

Everyone who consumed it said it tasted great. I totally agreed with them too. Even my picky little brother who is also gluten-free liked it! And I think I saw my husband having one of the few leftover pieces for breakfast this morning!

If you are interested in trying a pie from scratch for the first time I would highly recommend you start here. Most of the ingredients I already had and it really didn’t take that much time to make but be sure to plan a little ahead. It will help. 🙂

Did anyone else try some fun recipes for the first time for Thanksgiving?

Operation Don’t Ruin The Nursery

I’ve often heard that parents want their children to have the best, and many will do whatever it takes, within reason, to make sure that happens. There were many times this weekend I stopped and thought, “Hmm, that must come after the baby is born, because if I really wanted Baby B to have the best I would have hired someone to do this.” In all seriousness, this weekend was a major nursery weekend. Since Justin was out-of-town deer hunting I decided to enlist the help of my parents and gets some stuff done.

I had originally set a goal to have the spare bedroom, which was to become the nursery, all cleaned out by our 20 week ultrasound. I missed that goal by weeks, but had the motivation to finish it before we had our carpets cleaned last weekend. This is what it looked liked before.

IMG_2047
Catch-all Room


I seriously went through about 15 years worth of stuff and donated about 10 bags full of clothes from my late teens and early twenties. Whoa, I wore a ton of halter tops.

I’ve been scouring Pinterest to find ideas for our nursery and came across a project I wanted to attempt that required me painting something on a wall. I am not all that creative or artistic so I went in to this project with the wall paint re-shook just in case it turned out to be a disaster. My parents came over to assist with moving furniture, painting it and hanging up shelving. Selby also tried to help but wasn’t very effective.

IMG_2037
The Happy Helpers.

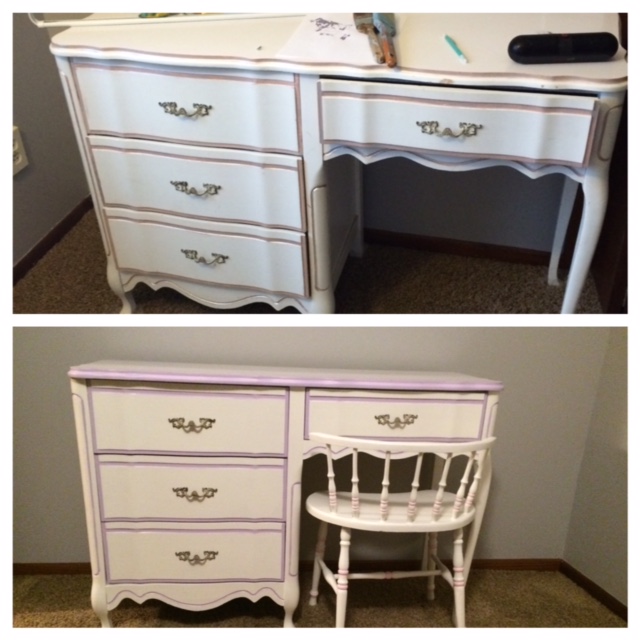
We decided to use my old bedroom set for the nursery furniture to not only save money, but I have had the set since I was a kid, and it was my Mom’s grandmothers so it has been around a long time and was still in fairly good condition. We sanded it, repainted it white and then I repainted the trim. When I was growing up the trim was pink. Since pink has always been a favorite color of mine, but I figure we will be gifted lots of it, I decided to accent Baby B’s room with purple.

IMG_2049
Before & After
IMG_2048
Before & After.

We painted a tall dresser, a desk and a nightstand. The trim was absolutely dreadful to do and will require some touching up. For now, don’t get too close or you will see I do not have a future in furniture painting. The desk will be turned into a changing table once we get all the needed accessories for it, but we should have plenty of storage for diapers, wipes, and all the other necessary baby changing items.

And now you are probably wondering how my Pinterest project turned out. Well, I have to be honest, I am super excited and happy with how it turned out. And if I am being really honest, I am pretty proud of myself!!! 🙂

Pinterest Photo...Not Mine.
Pinterest Photo…Not Mine.
My Finished Product!

The Pinterest one looks way more professional and more like a tree than mine does but that is ok. It is better Baby B learn now that her mother isn’t perfect. 😉 Overall, I’d still say I nailed it.

It has been a labor of love this weekend trying to get the nursery started and I am definitely feeling it today. Getting out of bed required a lot of limping as my lower back feels like it fused together. Oy! Where did my core strength go? So on that note, I am relaxing for the rest of the night with some laundry and plan to do some stretching before bed. This Mama is exhausted!


Any guesses?

This is the week Justin and I have our 20 week ultrasound. First, are we for real halfway there? And second, I really hope the kid cooperates and shows us their goods, but of course what I am really hoping for is a child who checks out as healthy as can be! I definitely have some anxiety going in to this appointment instead of all excitement. What else is new though?

With that said, are you leaning one way? Here are some things to help make your guess a little more educated.

image1-3

1. Justin thinks it is a girl. I think boy.
2. I have no idea if I am carrying high or low because the belly isn’t that big yet and frankly I don’t entirely know what that means, but I feel like I am carrying a little more out than expanding horizontally (or is that just wishful thinking?). I think that means boy.
3. My skin has not gotten worse, except right now it ain’t so good, so that could mean boy.
4. The baby’s heartbeat has always been 160+ so that means girl.
5. Per the Chinese birth calendar, it is a girl!


Easter/Birthday Weekend

I wanted to share a few highlights from the last two weeks. They went by extremely fast since there was a holiday, birthday and a five-day business trip all back-to-back.

Justin and I decided to host Easter this year so we could see family the week of my birthday (my birthday was the Thursday after Easter). It ended up being an absolutely gorgeous day so we were able to eat outside and play some yard games.

IMG_0016

EasterWe enjoyed a mostly gluten-free Easter lunch that consisted of ham with pineapple, a poppy seed salad, potatoes and a yummy gluten-free birthday cake. I also made some fun, Pinterest inspired Jesused Eggs (you can’t call them deviled eggs on Easter, right?)

photo-4


Some people thought they looked kinda gnarly, but let me tell ya, they sure tasted good. After games and plenty of food, we did a mini Easter egg hunt for little Lainey to wrap up the weekend.

photo-5


Pinterest Party

Although Pinterest has been around for a while now, I can still lose hours and hours to it. Luckily, I have kicked the habit that was originally developing and now only log on once or twice a week. I have enough distractions in my everyday life to have let that one take over, thank goodness.

I was, however, super psyched when a creative friend brought up the idea of having a Pinterest themed get together. We were planning to meet that upcoming weekend with another couple who recently had their first baby. We decided that baby gifts had to be inspired by something seen on Pinterest, as well as the food consumed.

Here is what we came up with:

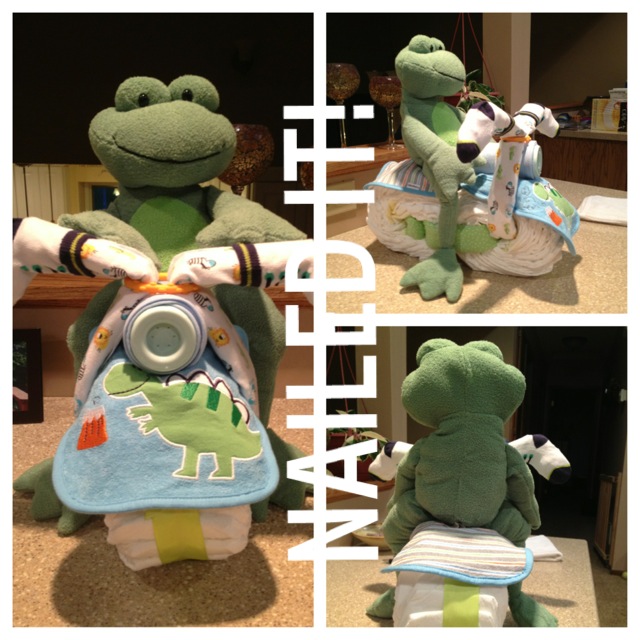
Motorcycle Diaper Cake is what I decided to attempt. I was super happy with the way it turned out!

This is what I started with.

photo-105


image-3
Finished Product
photo-106
Pinterest Version / My Version

Needless to say, I think I did a pretty good job. And a Pinterest project can really go either way. It was pretty easy to make and you can find a step-by-step tutorial on Pinterest.

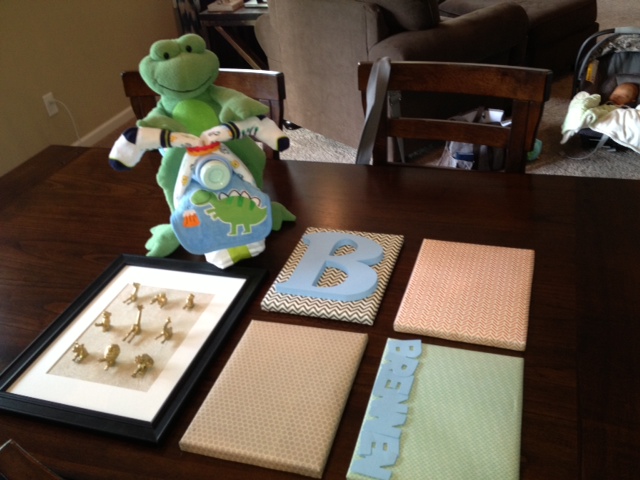
Diane, my creative friend, made a DIY Canvas Art for the baby’s nursery and DIY Mounted Gold Animals. She noted that the Gold Animals turned out so neat she almost kept it for herself. It would look great any where, not just in a nursery.

image-4
All of our Baby B gifts.

And we can’t forget about the food. We had a lot of it so I will just highlight some of the best creations.

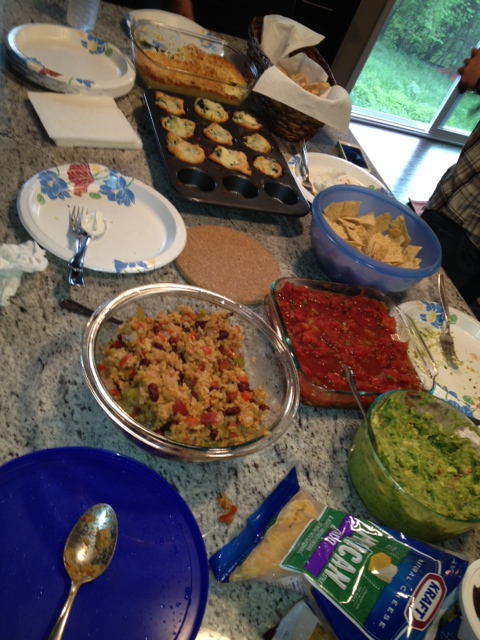
Diane made Baked Tacos, Lisa (new baby mama) made some amazing Guacamole, and I made Skinny Funfetti Dip.

image-5
Baked Tacos
image-6
A table full of food and only six people, plus a baby.
image-7
Skinny Funfetti Dip

Skinny Funfetti Dip
1 box Funfetti Cake Mix
2 cups non-fat plain yogurt
1.5 cups lite cool whip

Mix it all together and refrigerate for a couple of hours before serving. Prior to serving add sprinkles on top for extra pizazz. Serve with graham cracker or Nilla Wafers. (I liked the Nilla Wafers the best.)

I’d say we had a super successful first Pinterest themed party, and I hope we have another one soon. And just for good measure, here is a picture of Baby B. Truly the star of the party.

image-8
Bundle of Love (one month old)

Have you ever been to a Pinterest themed party?

Happy Earth Day

I can’t believe I haven’t blogged since Easter! Man, where have I been? I won’t bore you with a ton of details. I will just get straight to today’s post…Earth Day!

I like Earth Day. For me it is a feel good day and a great reminder to treat our land with respect. It is something so many of us forget to do…me included. It also provides a great reason to attempt yet another thing you have found on Pinterest.

Last night I set out to make some pretty amazing cupcakes I came across. I am doing my best to not consume everything I bake by myself so I thought I would share them with neighbors and coworkers. Little did I know, I was living with a cupcake fan that could rival my own love for them.

This is how they turned out. A complete Pinterest WIN! Especially compared to my most recent Pinterest FAIL!

photo-96

I made them right before bed so I ended up leaving them on the counter to cool and let the frosting set. By the time morning came I woke up with a start thinking of my Earth shaped cupcakes. As I approached the hallway I saw something that resembled a ball…a ball that looked like an Earth shaped cupcake!!! I jumped straight for it and realized it was indeed one of my cupcakes. I quickly raced downstairs with Justin to find that half of my cupcakes were missing!!! Six in total.

We honestly stopped and thought, “Wait a minute. Could I have put half of them somewhere else?” Clearly we were still sleepy. Then we found this.

photo-97

I recognize a cupcake coma when I see one. At first I was pretty upset. Then I kind of felt like this. We could not find where she ate them either. No sign of crumbs or cupcake paper.

I brought what I could to work, but unfortunately couldn’t unveil my sweet cupcakes to everyone in my department because there wasn’t enough…AND they fell off my car seat on the drive in and totally got smashed. Some still risked it and enjoyed them though. Or so they tell me. I am still pretty new.

When I got home I encountered a very energetic puppy. Still on a sugar high perhaps? She didn’t get sick any where which was a relief. We played some fetch with her ball and she was looking awfully cute. How can you even think about being mad at this face?

photo-98

I felt bad leaving her but had to run to Stillwater quick. I was anxious to get back to my cupcake guzzling puppy and found this waiting for me.

photo-99

Thank goodness I took the shoes out of the box and put them out of her reach. Although I am finding each day she can reach things I never thought she could. Needless to say she is about to be put up for sale. On the bright side it is within the Earth Day theme of buying used. 🙂  (Ps. Note the red spots. Clearly that is where she enjoyed her cupcakes.)

Has one of your pets ever eaten something you were excited about sharing?

Easter Recap

I hope everyone had a great Easter! I sure did, but I have to say, Easter is definitely not the same now that I am candy free. Easter is hands down my favorite holiday to indulge in  sugary treats. I love Starburst Jelly Beans, Mini Eggs (try them frozen, yum!), and of course, Reese’s Eggs. But this is the second Easter I have not eaten candy. I know, crazy!

I found other ways to get a little extra sugar this easter, even though I am doing my best to cut back. (Anyone else a sugar addict?) I found this cute idea on Pinterest for Chocolate Covered Strawberries that look like carrots. Made with love for the Easter bunny.

photo-93

Cute, right? Only if you are Harry and David. Here is my attempt. And believe it or not, they would have been worse if Justin would not have helped me.

photo-94

Besides the fact that I totally nailed this Pinterest creation, I had a great time with family. Here are some pictures to recap.

IMG_0575 IMG_0576 IMG_0552

150452_10151525105127002_1670775604_n 40836_10151525104797002_1345736350_n 392700_10151525104802002_241663133_n 524131_10151525105117002_1504353784_n 891820_10151525104807002_1188092743_o

Hard BAKED Eggs

No sooner had I pinned this to try later and my friend Ashley was already blogging about it. The idea is: baking eggs, instead of boiling them.

I am sure we have all struggled with peeling the shell off of a hard-boiled egg. Sometimes it can go perfectly and other times, well half of the egg comes with the shell. It is quite frustrating and makes you want to vow to never hard boil eggs again. Well, now there is a solution!

Hard Baked Eggs

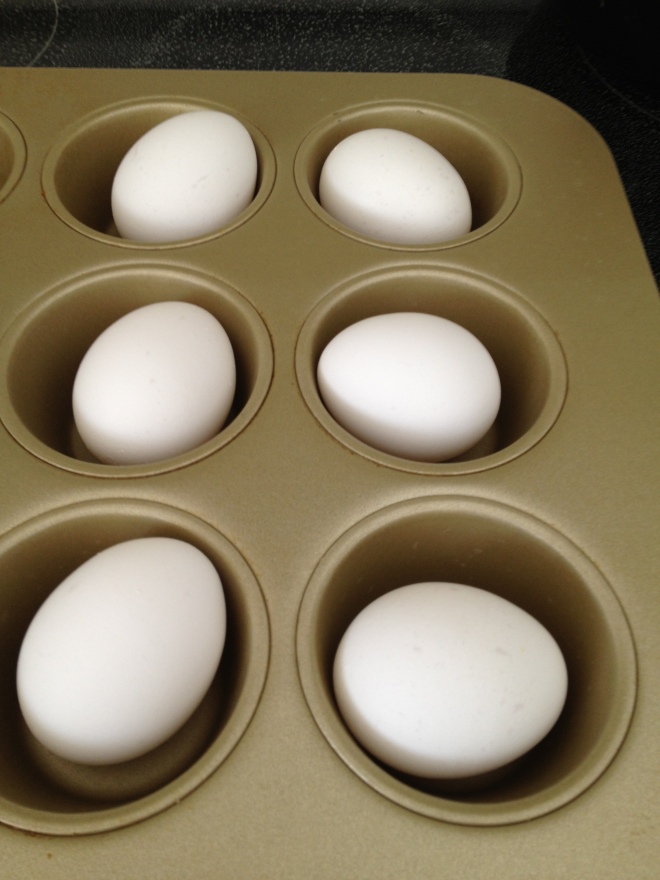
Preheat oven to 325F. Put one egg in each hole of a muffin tin. This way they don’t bounce around and get lost in your oven.

photo-88

Baked for 28 minutes. Once the timer goes off take eggs out of the oven and place into a bowl of very cold water. I used a spoon to remove them from the tin, because they are obviously going to be very hot coming out of the oven.

photo-89

I let the eggs sit for about 15-20 minutes. Once I thought they were cool enough I started to peel. And let me tell you, they peeled so incredibly easy!!! But there was one thing that was a bit wonky and unexpected- they looked like this.

photo-90

I thought I burned them. However, I consulted with the expert at Following the Yellow Brick Road, and she said that is how they are supposed to look when they are baked. Phew.

I urge you to give it a shot and save a whole lot of time trying to peel the suckers!

Have you ever tried something you found on Pinterest and it saved you a lot of time and effort?

Baked Oatmeal & Egg Muffins

I love finding good recipes on Pinterest. And I love when they actually turn out even more!! A couple of weekends ago I had some girlies over for a Lia Sophia get together. If you are unfamiliar with that, it is basically a jewelry party much like a Tupperware (do they do those anymore?), PartyLite or Pampered Chef.  It was a brunch style get together so I obviously was serving mimosas and turned to Pinterest for some inspiration for food to serve.

This is what I came up with: Baked Oatmeal & Egg Muffins. Both turned out really well, and I have even made them since the party. As usual, I also modified the recipes a little bit as well.

Baked Oatmeal

2 cups whole wheat rolled oats
1 1/2 tsp. baking powder
3/4 tsp. salt
1 cup chopped pecans (I used more, because it is tasty.)
1/4 cup raisins
1 cup diced apples (I use less than original recipes. I don’t like baked fruit.)
3 eggs
2 cups fat-free milk
1/2 tsp. vanilla extract
1/3 cup light brown sugar (I’d like to play around with this to see if I can bring the sugar down)
1/2 tsp. ground cinnamon
1/4 tsp. nutmeg

Preheat oven to 325 F. Grease an 8 x 8 pan. Soak raisins in a small bowl of hot water while you prepare other ingredients.  Mix together oats, baking powder and salt in a larger bowl.  Stir in apples, pecans and raisins.

Whisk together eggs, milk, brown sugar, cinnamon and nutmeg. Pour over dry ingredients and stir together. Transfer to pan and bake for about 1 hour, until golden brown.

photo-83

I made mine in a loaf pan. It made for quick and easy breakfasts all week as we sliced off a piece each morning to heat up before leaving for work!

Egg Muffins

1/2 pound Italian seasoned ground turkey                                                                                1/4 cup of chopped green peppers                                                                                               1/4 cup chopped mushrooms                                                                                                          1/4 cup spinach                                                                                                                                1/4 cup chopped onion                                                                                                                    12 eggs

Preheat oven to 350 F. Whip everything together in larger bowl. Spoon egg mixture into greased muffin pan. Bake for 20-25 minutes. Sprinkle shredded cheese on top of muffins and let melt for the last five minutes.

When I add veggies to a recipe like this I never measure. I just load it up! Use as much or as little as you’d like! We also refrigerated a lot of extras and heated them up with our baked oatmeal. Both recipes provided us with a nutritious and protein packed start to our day!

photo-81